>

Help cms

Help cms - GearCode

CMS Pomoc


  • CMS main menu overview
  • Visual HTML article editor
  • Brief description of editor options
  • Restoring data from backup
  • Managing SEO
  • Managing configuration files
  • Managing storehouses (branches, deliverypoints, shops)
  • Displaying custom notice on landing page
  • Using widgets in CMS editor (coming soon)
  • Administrating menu


  • Editing system articles:

    Overview (read before editing)
    a) carousel (sliders)
    b) footer d) information bar


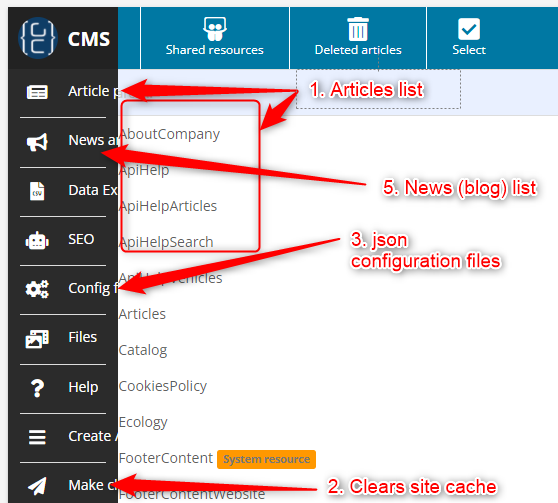
    CMS main menu overview

    1. Go to Articles list
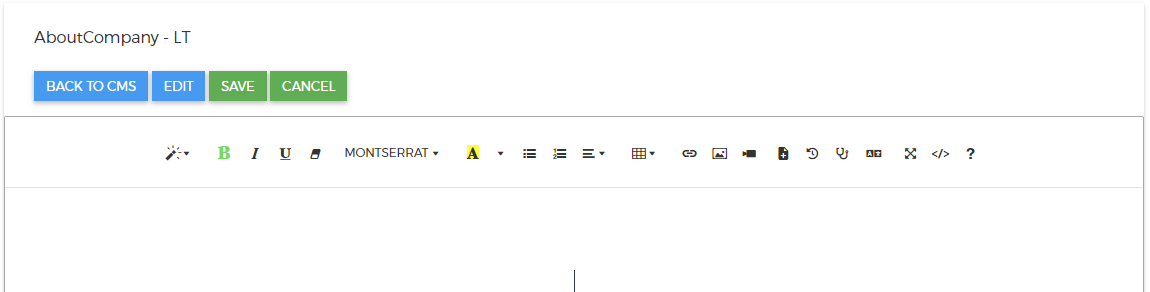
    2. Clear site cache - makes changes visible immidiately on website. Applies mostly to System articles (marked as System resource on article list), which are normally cashed on website and other cashed data like storehouses, custom metadata for SEO and so on.

    3. CMS config editor - edit site configuration - allows to manage some site configuration elements (requires basic understanding of json files structure)

    4. Article list - choose article to edit. 

    5. News categories for blogs and latest news

    Shared resources - this section contains another Articles list which can be used in multiple website of same customer (articles not related to one website only). It is described in Managing SEO part

    WYSIWYG view:

    Code view:


    Visual HTML article editor

    Visual editor allows you to manage website content in natural way. You can use toolbar options to manage headers (visual styles), predefined fonts and colors.

    Images can be uploaded with Drag&Drop operation or by using dedicated file manager - 

    If you wish to upload and link any file inside edited article, watch tutorial below. This allows you not only to insert images but also to embed files like PDFs or other data, you wish to link and download from your website, like terms & conditions, forms and so on.


    Brief description of editor options

    In correct order:

  • Insert link (alternate to Drag & Drop)

  • Insert image (alternate to Drag & Drop)

  • Insert video (paste link from YouTube - embeds video on website)

  • Upload file - also allows creating download link to freshly uploaded file

  • History - displays change history of edited article. Allows to restore previous version of article from backup. Backups are created automaticaly on save

  • Detailed mode - HTML editor helper - displays HTML nested objects and elements like <div>, <span>, <a> and so on in order to help keeping appropriate document structure. Mostly used in editing System resource articles, like Carousel editor (LandingPageSliders), where it is highly decommended to use detailed mode and have at least basic HTML knowledge

  • Translations - this option allows to insert predefined translation. Translation list is limited, but may be helpfull. Inserted key visible in editor will be automatically replaced with correct translation on website. This option is helpfull for editing system resources like footer.

  • Toggle fullscreen icon

  • Code view - important option which allows to edit generated HTML directly. Mostly used when editing system articles, to correct code or add specific style sheets. 

  • Editor shortcuts help list
  • Editing system articles - Overview 


    Caution: In order to edit system articles you must have some HTML knowledge (at least basic and know how to use Code View option of CMS editor.) You can't leave any empty or unclosed tags inside carousel article template. Otherwise, homepage won't be displayed correctly or whole website won't render as expected.

    Making changes visible on website

    All changes made to any of system articles will be automatically visible on website when cache expires (maximum time 24h or less, depends on when current cache was created).
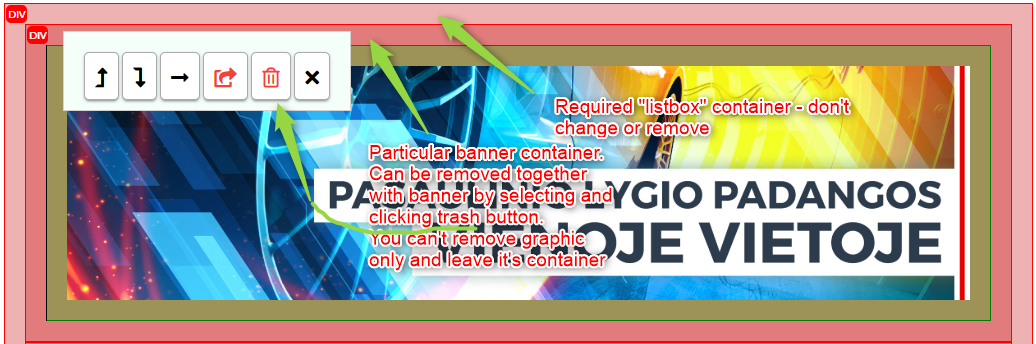
    If you wish changes to be visible immediately, save your changes, click Back to CMS button and press Make changes visible now button - it'll refresh cached data 


    Editing landing page arousel (sliders)


    Notice: Make sure, you've read "editing system articles - overview" above, before reading this part


    In order to add or remove slides from carousel:

    1.  Open on CMS articles list and choose appropriate language.
    2. Click EDIT button; notice displayed warnings.
    3. Turn on Detailed mode, by clicking this icon: 
    4. Edit according to rules described below

    a) Removing carousel banner

    Notice: First banner in edited article is always shown on homepage (as first in carousel). Rest of them is being randomly selected (3, max 4 are displayed).

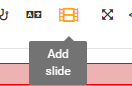
    b) Adding new banner

    Click Add Slide icon 

    Make steps according to AddSlide wizard. New banner will be added to end of banners list.
    Notice, that order does not matter, as banners are randomly selected (excluding first one, which is always visible)

    Code view:
    After changes, in order to check code accuracy, enter Code view
    (). Correct code should look this way:

    <div class="carousel-inner" role="listbox">
        <div class="item active"> 
                <img src="/images/getFromCms/carousel/LTSHOP1.jpg" alt="">
        </div>
        <div class="item active">
                <img src="/images/getFromCms/carousel/LTSHOPlogistics.jpg" alt="">
        </div>
        <div class="item active">
                <img src="/images/getFromCms/carousel/LTSHOPprice.jpg" alt="">
        </div>
    </div>

    Every opening tag must have it's closing tag. There should be no empty elements, like:

        <div class="item active">

        </div>


    Editing footer content


    Please, watch video tutorial before editing footer content


    Editing information bar


    Information bar is used to display any required information on homepage, like info about working hours during holidays, etc.


    Default information bar template:
    <div class="card m-b-0 m-t-10"><p class="m-b-0" style="padding: 10px; color: red">Information</p></div>   


    Restoring data from backup

    To restore data from backup, press History icon on editor toolbar. Choose required version (usually last one), press restore and save. If you're restoring system article, refresh website cache to see changes.


    Ważna informacja


    Wszystkie zdjęcia w artykułach należy zamieszczać w formacie ".webp"

    Do zmiany rozszerzenia pliku może służyć strona: https://squoosh.app/

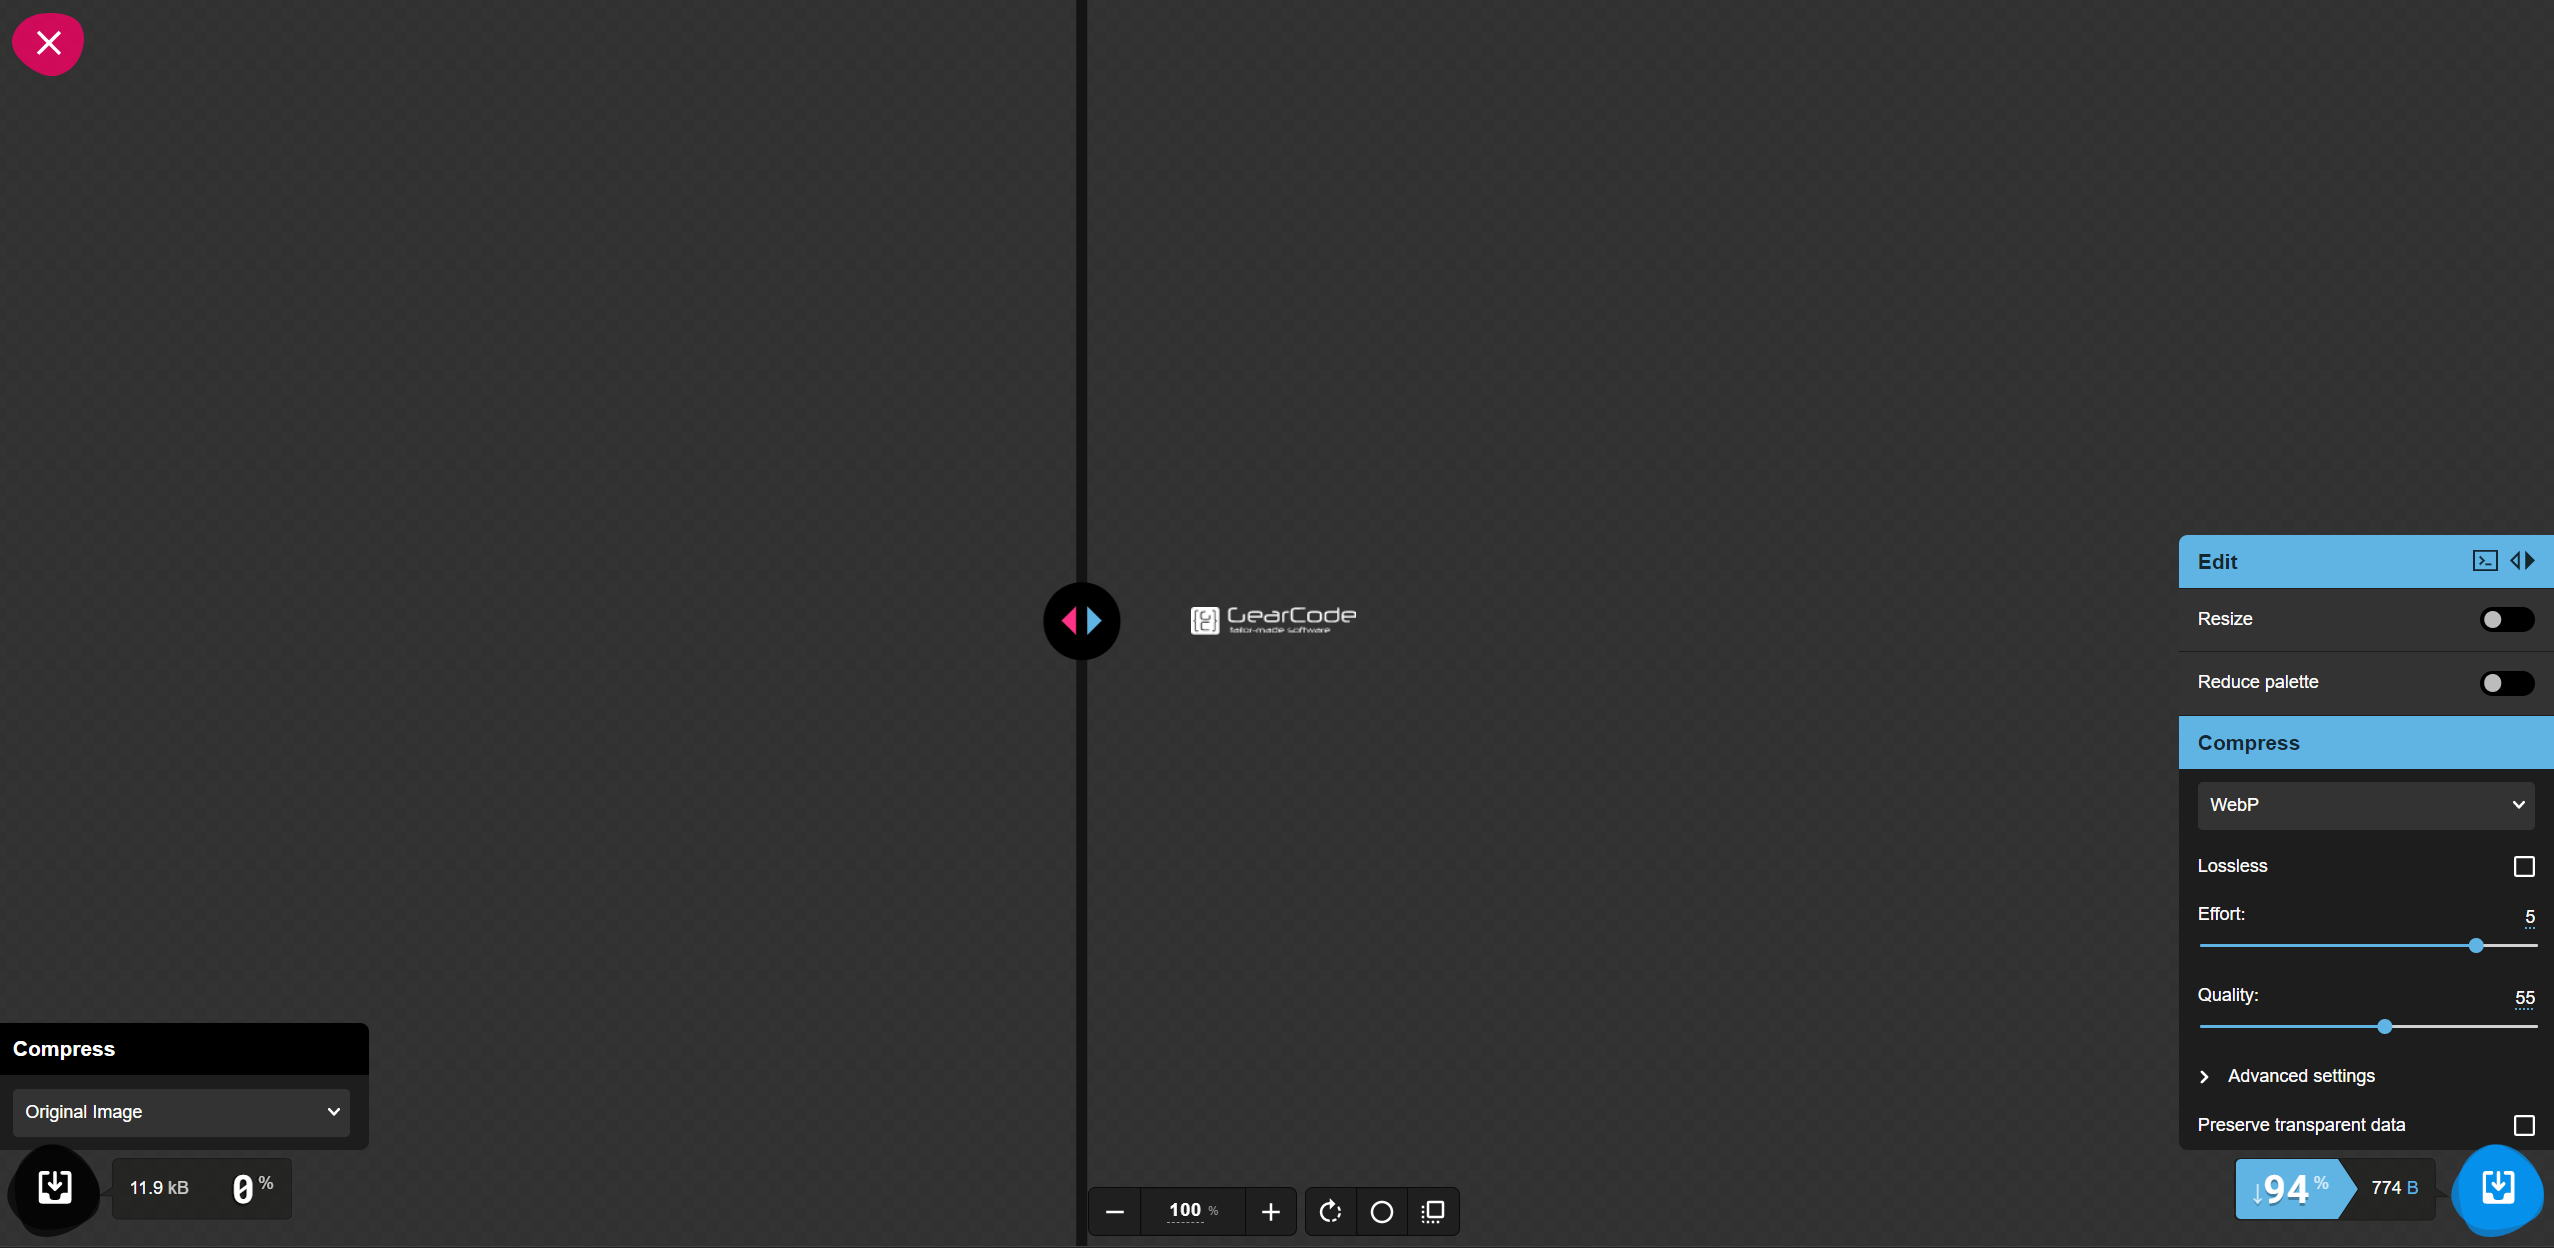
    W prawym dolnym rogu należy zmienić "Compress" na WebP. Natomiast pozostałymi dwoma suwakami można zmienić jakość zdjęcia. Na środku ekranu linia pokazuje nam zdjęcie, po lewej bez zmiany, a po prawej obecną zmianę jakości.